-
Please LIKE and support / share or suggested members and friends to add into the group, thanks.
Posted by 品味。生活 on Thursday, December 3, 2015Please LIKE and support / share or suggested members and friends to add into the group, thanks.
Posted by 品味。生活 on Tuesday, December 15, 2015
10.31.2009
10.27.2009
10.25.2009
10.24.2009
人鬼情未了
本身首歌又真係幾拖長黎唱,唔係段段都可以拎黎用,
想拎黎用又太長,又想有個頭再拖住個高潮又係太長,
只好由個高潮CUT起就直到曲尾-,-好似無咩好聽咁=3=
10.21.2009
10.20.2009
10.19.2009
奇想
其實好多野係咪我自己一相情願,
係咪有可能有一個人永遠唔嫁人,肯跟住你一世,
雖然呢d仲係好似好遙遠既事情,
直至到呢刻,我依然仲好似好天真咁,
相信我地可以白頭到老,其實事實上真的可以嗎?
當你既屋企人問,你到左適婚年齡,你無男朋友咩?
你會為左向屋企交代而放抵我嗎?
相反地,我屋企人知道我既問題,唔會有咩特別問題去為難我,
但係我會係你既身份上諗以後日子既問題,
我怕你睇完會唔開心,所以先唔直接係電話度講我正在想什麼呢!
或者我咁諗都係為你帶來壓力吧,咁長遠的事點想預料,
而且你更加唔想令屋企人失望
10.18.2009
安裝 Windows XP 內置手寫板輸入法
其實呢個都係FOR我媽既,唔識打字麻,但佢又好想上網!!
在〔開始〕→〔控制台〕→〔地區及語言選項〕→〔語言〕
→在〔文字服務和輸入語言〕按〔詳細資料〕,
在〔已安裝的服務〕 按〔新增〕選〔中文 (台灣)〕後
在〔鍵盤配置/輸入法〕選〔微軟新注音輸入法 2000a〕,
按〔確定〕完成安裝。在使用手寫板輸入法時先切換至〔注音〕輸入法後便會出現如下的一排圖示,
選上紅圈的〔工作選單〕的圖示再選〔輸入法整合器〕手寫板便會出現了,
利用鼠標依手寫筆劃作手寫板用便可。
10.17.2009
10.16.2009
Setting up Windows XP Device to Access PCCW Wi-Fi Service
This page provides instructions for HKUST Staff & Students to setup Windows XP devices to connect to PCCW Wi-Fi Service.
Users are recommended to use the Wi-Fi Services Advisor if they are not sure which Wi-Fi service should be used.
The setup guide consists of 2 parts:
Configure PCCW Wi-Fi Service
Step 1: Bring up Network Connections window
- Click Start
 Settings
  Network Connections
 - Turn on the wireless connection:
- Right-click Wireless Network Connection
- If the word Disable is present, then select Enable
- Some notebooks have switches or buttons for enabling the wireless connection. Please ensure it has been turned on as well.
- Right-click Wireless Network Connection again, select Properties, click the Wireless Networks tab
- Tick Use Windows to configure my wireless network settings
- Press Add...
Step 2: Configure Wireless Network Properties (Association tab)
- Key-in Universities via PCCW in the Network Name (SSID) field (Note: SSID is case-sensitive)
- Select WPA in the Network Authentication: field
- Select TKIP in Data encryption: field
- press the Authentication tab for next step
Step 3: Configure Wireless Network Properties (Authentication tab)
- At the Authentication tab:
- Select Protected EAP in EAP type: field
- Untick field Authenticate as computer when computer information is available
- Click Properties for next step.
- Select Protected EAP in EAP type: field
- In the Protected EAP Properties window:
- Ensure Validate server certificate is ticked
- Tick Connect to these servers
- Key in wireless.ust.hk
- Tick Thawte Premium Server CA in the Trusted Root Certification Authorities:
- Tick Do not prompt user to authorize new servers or trusted certification authorities
- In the Select Authentication Method: drop down list, choose Secure Password (EAP-MSCHAP v2)
- Tick Enable Fast Reconnect
- Press Configure... for next step
- In the EAP MSCHAPv2 Properties window:
- Untick Automatically use my Windows logon name and password (and domain if any).
- Press OK three times
Step 4: Configure Advanced Properties
- Configure Advanced Properties of Wireless Networks
- Press the Advanced button at the bottom of the window.
- Select Access point (infrastructure) networks only
- Untick Automatically connect to non-preferred networks
- Click Close
- Configure Firewall
- Select the Advanced tab
- Press Settings...
- Tick On (recommended)
- Press OK twice
You are done with the configurations of PCCW Wi-Fi Service!
Access PCCW Wi-Fi Service
Step 1: Connect to PCCW Wi-Fi Service
- When you reach any PCCW Wi-Fi Service hotspot, you will see this icon in the system tray. Click on it and the Enter Credentials window will appear.

Step 2: Logon to PCCW Wi-Fi Service
- In the Enter Credentials window:
- Enter your ITSC Network Account in the format of username @ust.hk in User name: field (Note: @ust.hk must be entered)
- Enter your password in Password: field
- Be sure to leave the Logon domain: blank
- Click OK to close the popup window.

Please note that the username and password are cached and hence the above window will not re-appear until you change your password.
- Enter your ITSC Network Account in the format of username @ust.hk in User name: field (Note: @ust.hk must be entered)
Step 3: Agree the terms and conditions
- You have completed the setup procedure. When you browse the Internet with a web browser, you will see the PCCW welcome page:
- Read the Terms and Conditions, click Agree and Continue, and you are ready to use the PCCW Wi-Fi Service.
Congratulations! You have connected to PCCW Wi-Fi Service!
10.15.2009
熊仔bb近況
應該有一金一白,白係女,金係仔,
有好多黑色,其中2隻係仔-3-
仲有一隻啡....似巴巴既又係女><
仲有隻最細小既,不過未肯定係咩色,總之係女啦~
今此d bb好定呀!任捉既-0-希望佢地快d大啦-3-
10.13.2009
Blackra1n iPhone 3.1.2 Jailbreak
我個人修改了一下方法:
1, 要關掉ITUNES及ITUNES HELPER
2, 直接按BLACKRA1N 直至RUNNING沒反應,
3, 只關掉BLACKRA1N,再重新開1個BLACKRA1N並運行
4, HOME+POWER 強制關掉IPHONE長按至出現白平果便放開
5, 就如論壇所說的情況下看到頭像
正常在第一次應該不行,
如第一次不行,請將IPHONE 強制關機,再重新開機,開ITUNES確認是否已連接
再關掉ITUNES及ITUNES HELPER 重試以上4點,正常第2次的就成功了!!!
Step 1) Install blackra1n and iTunes 9 or newer.
Step 2) Close itunes and kill iTunesHelper.exe in taskmanager.
Step 3) Attach your device to your computer using the cable, and run blackra1n. You see this:

Step 4a) Hit the “make it ra1n” button. You will see this:
and this
and finally this. This step should only take a couple seconds. If it hangs on running you have itunes helper still running.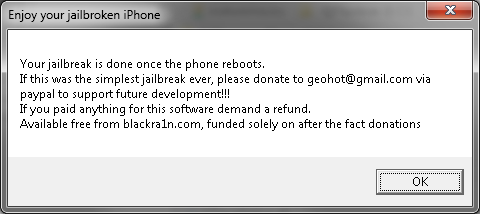
Step 4b) Now, watch your iPhone
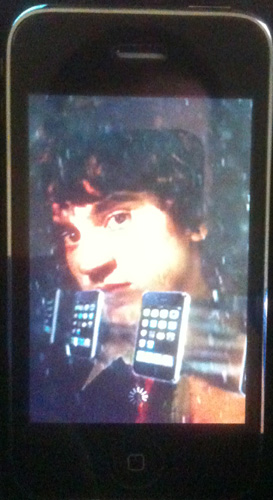
Step 5) Now the jailbreak is done, it’s time to install cydia.
Note: There is plenty of discussion on whats better between cydia, icy, and rock app. I can tell you that Cydia is strongly recommended even if you don’t want to use it. It does everything right and installs a proper BSD base. Rock app is flashy and cool also. The jailbreak install of Rock does not install rock extensions so it is ok to install. The icy install is broken on this jailbreak (version RC1). At this time, I recommend not installing it. It does not get installed with super user permissions and cannot install software properly.
On your device you now have a new icon: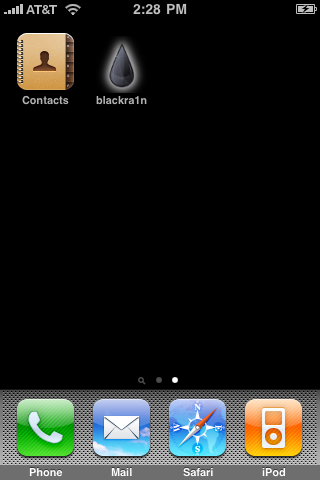
Load this app and select your installer preferences. Remember, we are not skipping cydia, icy doesnt work in RC1, install Rock App if you want also.
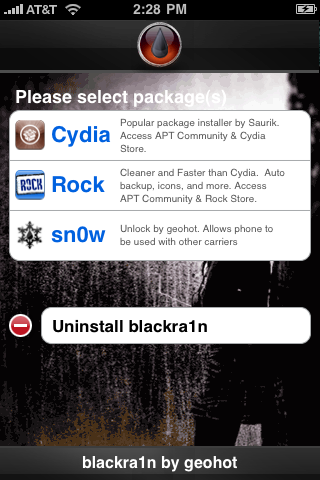
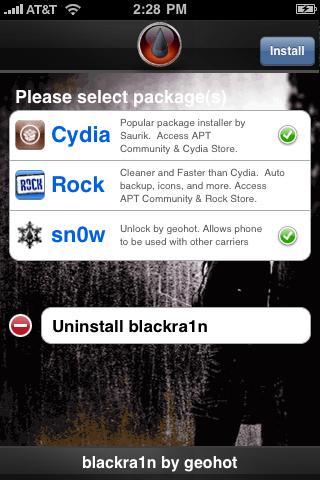
Your selections will now install:
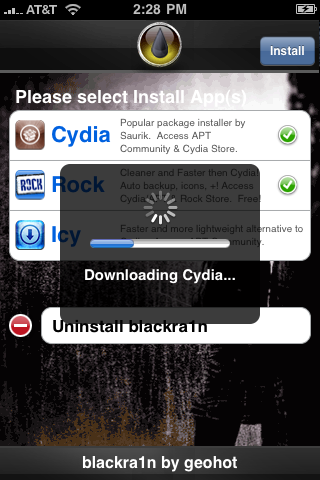
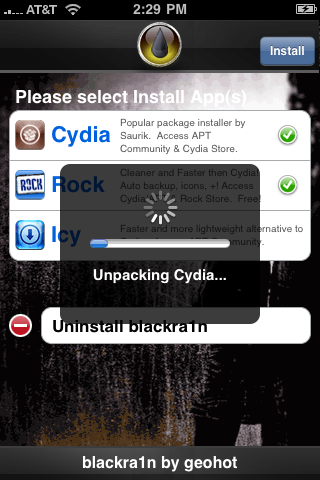
Step 6) When you are all done, load up blackr1n again and use the uninstall blackra1n to remove the blackra1n icon. It’s not needed any longer.
Step 7) Load Cydia, let it reorganize your apps, do the upgrades, and install your software!
Troubleshooting:
1) Blackra1n just crashes - You don’t have itunes 9 installed or your apple mobile device service is not running. Install itunes 9 or reboot to solve.
2) Blackra1n says it’s missing QTCF.dll. Put QTCF.dll into the same folder with blackra1n.exe and run it again.
3) Blackra1n hangs on running… - You need to kill iTunes and iTunesHelper.exe. This step should only take a couple seconds and something should happen.


